
*Sponsored – Helps pay my bloggy bills. 🙂
DIY Project: How To Make Your Own Mailbox.
Creating your own mailbox is a rather simple project, and shouldn’t take much longer than a single weekend to complete. To help make this DIY project as hassle-free and smooth as possible, take note of the following 5-step strategy. Together, they can help you build a great-looking, robust mailbox of your own design.
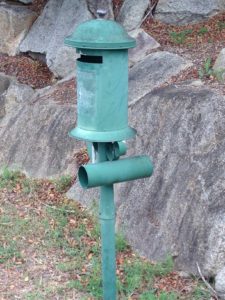
Time for a new one!
1. Start with a plan
Remember that often used saying: “if you fail to plan, you plan to fail?” Well, this is certainly true when it comes to building your own mailbox. Of course, before beginning you should have an idea of the mailbox’s general design and layout. It helps to draw this out, and include as much detail as possible (e.g., the materials to be used as well as the measurements). But it also includes knowing exactly what tools you’ll need to bring it to life. You may want to visit this website for ideas on design concepts as well as help on choosing the best tools for the job.
2. Follow your plan
Once you have a plan, you’ll need to stick to it – as closely as possible (of course, don’t ignore spontaneous spurts of creativity). Make sure you trace your design on the wood (or whatever material you’re using) before you cut anything, and double check your measurements. This will save you making mistakes, which will in turn save you money. After cutting your pieces with a high-quality saw, you’ll need to check they all fit together nicely. If everything looks good, it’s time for the next step.
3. Putting it all together
Before physically connecting all your pieces together, take some time to smooth out all the edges with some sand paper or a mechanical sander. Then, glue everything together, before finally nailing them all together. Don’t forget to check the positioning of your hinges (for your mailbox door) to make sure everything closes properly. Once you’ve assembled your mailbox, you can either stain it or paint it to protect it against the elements. Make sure you put a couple of coats of either to give it maximum protection.
4. Handle and a house number
Great, you’re almost done in building your own mailbox. But you’re not quite finished yet. Before calling it a day, remember to put your number on your mailbox so everyone knows where to send your mail (the postman will thank you for it, too!). There are a variety of styles and colors of numbers that you can choose from to personalise your mailbox. Experiment a little, and do whatever looks best for your house.
5. Getting your mailbox ready for use
Congratulations! You’ve now built your very own mailbox. It’s looking good and ready for
action. The final step involves mounting your mailbox on a post (either wood or metal) and planting it firmly in the ground. This will involve some digging, and a little bit of concrete to keep the mailbox firmly in place for years to come.
Building your own mailbox really is a simple DIY project. Take note of the above when building your own, and no doubt you’ll have a project you can be proud of.